The Shape Builder Tool is a great tool to create, edit, combine and dissect your Illustrator Objects (shapes) in a more organic way. The Shape Builder Tool shares many similarities to the Pathfinder Window.
So what are the differences? The Shape Builder Tool provides you (the designer/art student/Illustrator Experimenter) with the opportunity to work and create a workflow that will feel more natural than the Pathfinder Window. The Shape Builder Tool provides the opportunity to push the what was/is possible with the Pathfinder Window further. (If you are not sure what the Pathfinder Window is read my blog on the Pathfinder Window.)
Let's Experiment!
Where is the Shape Builder Tool?
 |
| Shape Builder Tool |
 |
| Shape Builder Tool Fly Out |
As you can see from these images the Shape Builder Tool has a Fly Out Menu associated with it. Therefore if you do not see the Shape Builder Symbol on the Tool Bar select from the Fly Out menu above.
1. Create the Objects that you would like to work with on your ArtBoard in Illustrator. Make sure that the Objects that you will be working with are active. When an Object is active it is selected. We always know that an Object is selected when we see its anchor points and paths as shown below.
 |
| Two Overlapping Active Objects |
2. Working with the Shape Builder Tool hover over the Objects and Click as shown in the three below images.
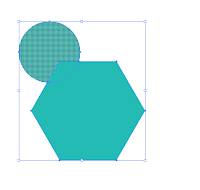 |
| Image 1 |
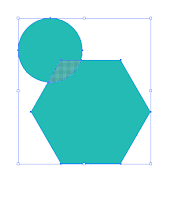 |
| Image 2 |
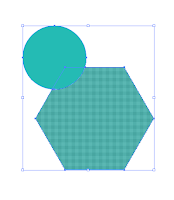 |
| Image 3 |
3. Through hovering and clicking the above Objects/Shapes we have created three separate Objects. Now working with Selection Tool (Black Arrow) and Direct Select Tool (White Arrow),
we can move these shapes/objects independently as shown below in Images 1b-3b:
 |
| Image 1b |
 |
| Image 2b |
 |
| Image 3b | | | |
|
|
|
4. Here is another example of steps to follow to work with overlapping objects with the Shape Builder Tool. In the above example I showed you how to Divide a group of Overlapping Objects/Shape. In the below example we will exclude the overlapping sections.
Overview and Steps for working with the below shapes:
1C- Make sure all Object are selected.
2C-5C - With Shape Builder Tool, click all areas where the shapes overlap.
6C- Deselect
7C- 10C working with the Selection Tool or Direct Select Tool select the overlapping shapes and delete.
11C- Final Result.
 |
| Image 1C |
 |
| Image 2C |
 |
| Image 3C |
 |
| Image 4C |
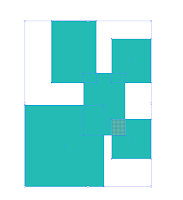 |
| Image 5C |
 |
| Image 6C |
 |
| Image 7C |
 |
| Image 8C |
 |
| Image 9C |
 |
| Image 10C |
 |
| Image 11C |
|
|
|
|
|
|
|
Here is a video to help with the Shape Builder Tool:


No comments:
Post a Comment